


Category: Photography
ContentRally is a leading source of reliable news and trending topics on Photography. Get hard-to-find insights and advice on Photography from industry-specific leaders.

How to Best Photograph a Corporate Event
A picture is worth a thousand words and yours should tell the exact story that you want to tell the world. You must find ways of having your photos say what you want them to say. Corporate events normally tend to be quite boring and stuffy affairs and this would most likely be captured in the event photos. A boring event captured in a picture would bore even the intended audience but this can be avoided by making use of these few pointers that will ensure your photographs spark the desired interest in your target audience. Get Creative with Angles : Assuming that there is no mingling in the event and everyone was seated; it would be quite boring to have many photos of a bunch of people in suits just sitting down. But shooting from different angles and from different perspectives can change all this. It may mean making use of the centerpieces that the event has put in place or it could be you getting shots from outside the room, the possibilities are endless. One just needs to think outside the box. Keep Photographer In The Know About the Intended Use of the Photos : Depending on where you want to use your photographs it is good to always let the photographer know so that they can know exactly how to capture the event. Say if the photos are to be used for the company social media profile, then the photographer and would know the exact angle to capture them from. The ideal photograph for a company website would be totally different from one to be used on the social media profile. Letting the photographer know in advance will ensure that you get the most value out of your pictures. Highlight On Keynote People at the Event : In the event that there are keynote speakers who are going to grace your event, it is always prudent to let the photographer know in advance so that he/she can capture them in the best light. In the same breathe, if there are people who absolutely do not want to be photographed, also let the photographer know in advance so as to not offend anyone intentionally or not. If as the organizer of the event, you are unable to point out the said people, it is well in order to have one of your staff members be the one to show the photographer. Let the Venue Help You Get a Photographer : Finding a worthy photographer who can live up to your expectations can be quite a task. Companies like the photo team are professional photographers who exclusively deal with corporate events but if one is unable to retain their services for one reason or other, you can choose to seek help from the event venue. Nowadays, most venues have their own in house photographers or know about good photographers from previous events held on their premise. Getting the venue to recommend a good photographer for your event is quite in order because chances are that he/she has had a photography session within the premises and therefore is aware of the good angles and will advise you accordingly. Have Fun with Posed Photos : As mentioned earlier, corporate events can be boring. This does not mean that the event photos have to be boring as well. Having fun with attendees of a corporate event will often times have them loosen up a whole lot more and this will give your photos a whole new flair as opposed to the traditional grip and grin type of photos common with serious events. Be fast about posing for the photos though because you do not want to delay the event or hold the attendees longer than necessary. Getting creative with photography takes skill and experience and unfortunately, not all photographers have these. It is best to seek the services of a professional event photographer who will give you exactly what you seek for in your event photos. Read More : 5 Essential Tips For The Traveling Photographer Handy Tools For Outdoor Photography
READ MOREDetails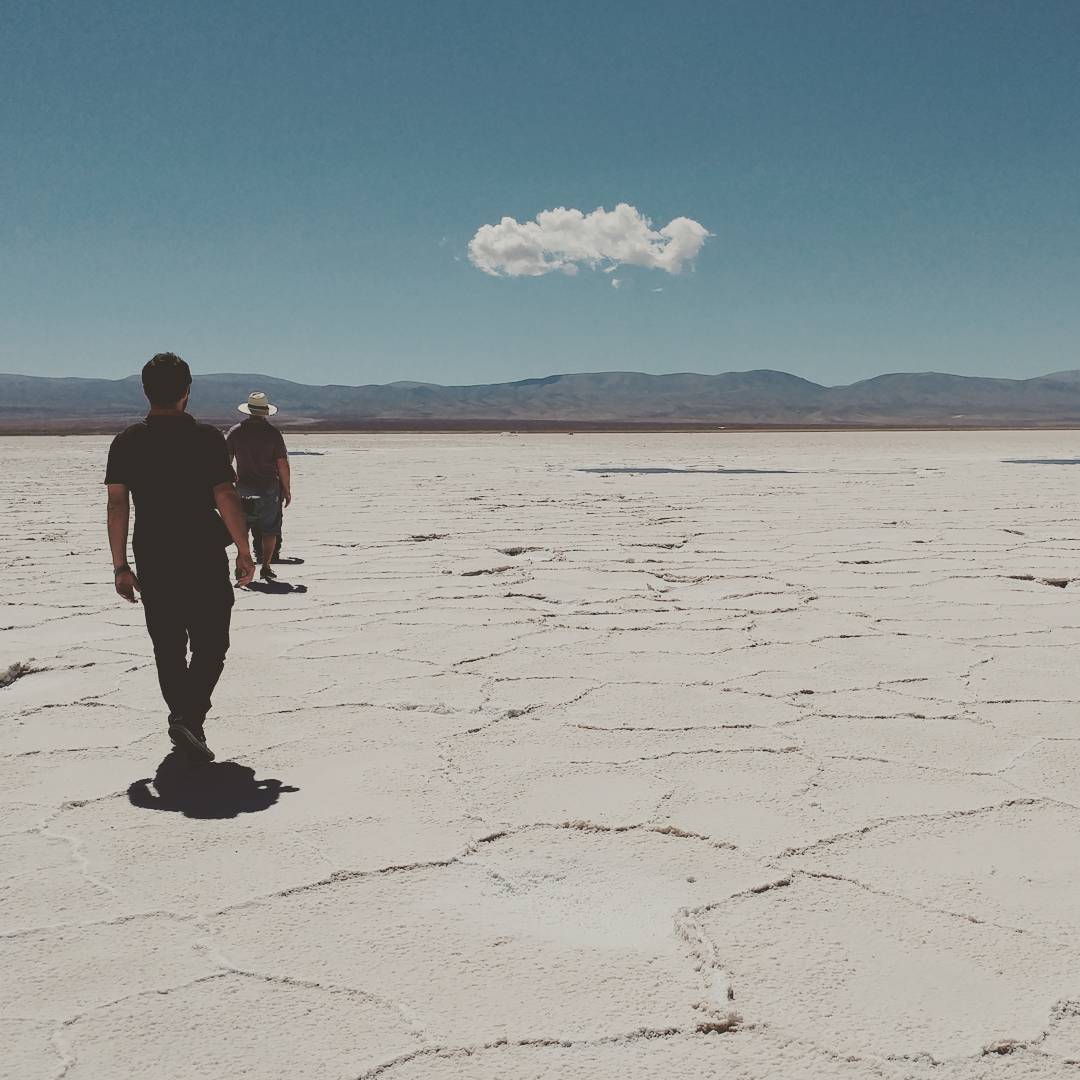
5 Essential Tips for the Traveling Photographer
Photography tours are a one of a kind opportunity to enhance and create extraordinary new photos. The exponential development of digital photography technology has permitted a booming phenomenon for the world of photography. Increased resolution and miniaturization has contributed to this expansion while significantly reducing equipment’s prices thus broadening its massive world reach. This has in part permitted a new audience to express themselves photographically. The causal image exploration attributed to the common availability of portable devices, such as smartphones and action cameras, are creating many new storytellers and video YouTubers with unique, local and fresh content to share with the world audience. This new generation of casual photo and video content creators has touched and reached virtually every spot on the planet, nowadays you can find images and photo references online for any part of the globe. Even if you’re not a professional photographer, traveling to a new destination has many advantages, the most obvious relates to the singular experience of the journey and its cultural immersion. Make sure you keep these 5 easy suggestions at bay while preparing for your photo tour 1. Pack Accordingly It’s a good idea that for any given trip, to pack your gear accordingly. A photography tour is not different. Make sure you carry enough batteries to last you for the entire day. It’s a good idea to bring at least two battery chargers, so you can charge multiple batteries simultaneously. This is also a good idea in the eventuality of charger failure. Once I had the unfortunate experience of arriving to a hotel room where only a single electrical outlet was available. Electricity might not be very reliable at your destination, so it’s a good idea to pack a small power strip with surge protection. This will add a layer of protection and the convenience of charging multiple devices at the same time. A fried camera is not fun under the sun! 2. Plan Ahead Balancing your sleep with photography can be a challenge. Usually, depending on your location and time of the day, the available light can be very unique during different parts of the year. Photographers love to photograph at the golden hour (usually at sunrise and sunset) This might require for some planning, and setting an alarm clock, but well worth it for landscape photography. 3. Bring your Smartphone Along While on location I usually walk with my professional camera, but sometimes I just want to take a quick snapshot and instantly share it in my social media stream. Use your smartphone camera, it has a more than decent megapixel resolution and it’s quick and easy. Tip: Make sure you keep your smartphone in airplane mode in order to save on battery life. 4. Get Off the Main Road Sometimes we tend to follow and stay in the common path during an excursion. It might drive your guide insane, but this will prove fantastic. Explore alternative roads. Taking an exact photo from the exact location then everyone else will produce the exact same photo. Try alternative angles and get off the main road. It doesn’t matter where you travel. Being prepared and doing your homework will prove to be an invaluable advantage. Pack accordingly for the type of photography you’re intending to do since it could mean the complete success or failure of your photography adventure. Safe journey and may you take incredible photos Read also: Handy Tools For Outdoor Photography 6 Reasons Why Every Woman Should Travel Solo
READ MOREDetails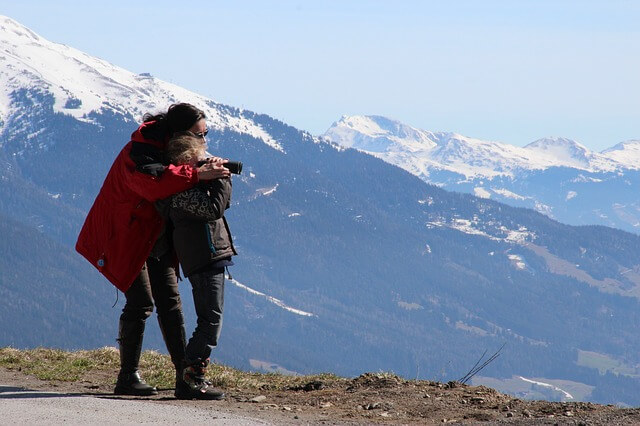
Handy Tools for Outdoor Photography
Whether you’re planning to explore wildlife in a nature preserve or you simply want to capture seasonal changes in your local park, no outdoor photography adventure should be undertaken without proper equipment. Outdoor conditions are unpredictable and your expensive equipment is sensitive, therefore you cannot be too prepared. Here is the list of handy tools you shouldn’t forget when venturing in nature. Here re Handy Tools for Outdoor Photography: 1. Cleaning Making sure that your lens and sensor are clean, especially when taking photos outdoors, should go without saying. Tiny dust spots, smudges, or even hair can make your carefully planned shoot less perfect, and using the software in post-editing can only do so much. To avoid this potential disaster, be sure to always carry a brush with fine bristles and a blower. These won’t take much space and can prove essential in ensuring clear and sharp photography. 2. Tripod Tripod is an indispensable piece of equipment for shooting outdoor sceneries since you never know when you will have to use long exposures. Capturing clouds and bird flocks early in the morning or tree silhouettes in dusk can be quite demanding if you forget your tripod. Be sure to pick a tripod of an appropriate height, and take into consideration that ground most likely won’t be flat. 3. Lens Be prepared to spend some money on a quality long lens. They are considered mandatory by many professional photographers, especially if your ambition is to capture wildlife. Something around 400 mm is a minimum. However, taking into account the crop-factor of certain cameras, you may find that the 300 mm lens will suit your needs equally well. Read the reviews of different lenses before buying one. 4. Backpack Planning an outdoor shooting should most certainly include a good camera backpack. Keep in mind several things when choosing a backpack. First and foremost, it needs to contain enough space for your equipment, especially the long lens we’ve already mentioned. Secondly, it must be sturdy and keep your equipment safe from different kinds of weather conditions. Lastly, you should seriously consider a backpack that is comfortable to wear, bearing in mind you will probably spend a lot of time walking. 5. Lights Lights in the form of a torch or a headlamp are standard tools for any outdoor activity. Nonetheless, many people get too preoccupied with camera equipment that they simply overlook something as simple as a torch. The best way to go is to get a small LED torch since it is ideal for lighting up even far objects. Most of the new torches can be easily recharged using the USB cable, and have various modes for illuminating farther and closer objects. Another solution is to pack a headlamp. For some, it is a more practical solution. It leaves your hands free, which can prove useful, both in taking pictures and walking on rough terrain at night. 6. Binoculars Finally, your outdoor kit wouldn’t be complete without a pair of binoculars. After you have chosen your ideal location, you may proceed to scan for a spot that captures your imagination. Although you can do this with your camera, it may prove impractical. When it comes to choosing specific binoculars, always factor in the waterproofing. You never know how fast the weather can change, and waterproof binoculars are a safe investment, even though this can increase the price a bit. Another important thing is the magnification. The two most common ones are 8X and 10X, the latter being usually a bit larger. This choice rests solely on your preference, but if you tend to travel light, you may instead consider getting a monocular. It is much lighter and does not occupy a lot of space in your camera backpack. To conclude, outdoor photography should be carefully planned. This does not comprise solely camera equipment, but other tools that are part of any outdoor experience, such as a backpack, a torch, or binoculars. Always waterproof your equipment, wear comfortable clothes and shoes, and be careful in your search for a sublime outdoor shot. Read also: 10 Must-Haves for Travel Photography 5 Handy Survival Tools to Invest On 5 Essential Tips For The Traveling Photographer
READ MOREDetailsPopular

Technologies For Creating A Startup Idea
20 Feb 2023

How to Download Facebook Videos on Android?
07 Feb 2019

Getting Legal Advice from Immigration Attorneys
22 Dec 2021